
When this fabric hit my inbox from Minerva about a year ago, I had a lightweight black blouse in mind immediately. However, when it arrived, I began to wonder where my head had been when I chose this fabric. I am absolutely a prints person – bright florals, animal prints, even silly novelty patterns, I’m your girl! When I do choose a solid, it is typically something bright – or at the least, something shiny. This was none of the above. A solid black cotton voile – soft, lightweight, and lovely… but not bright, not colorful, not printed. What in the WORLD was I going to do with this?

As I thought about how to make a solid black cotton a little more “me,” I ran across a photo of a very cute black wrap top. Not long after, the idea of an Orchid Midi Dress hacked into a faux wrap top was born… And here we are today! This has very unexpectedly become one of my favorite things in my closet, and I’m absolutely loving finding new things to pair it with on a constant basis. The silhouette and the fabric work so well together, and I don’t really ever want to take this off!

To create this Orchid Top Hack, I began with the original Orchid pattern pieces. I tried on my existing Orchid Midi Dress (also made with some great Minerva fabric!) and measured down from the waistband casing to where I wanted the hem of my top to land. I took the skirt pieces of my pattern, and layered the pocket piece below the skirt piece to come up with the rough shape for the peplum. I wanted to omit the pockets in the finished garment, but needed to layer the pieces together in order to create the shorter, pocketless peplum from the skirt. I measured 8 inches at the side seam, and then followed the original curve of the waist to create the correct shape of the hem curve.

From there, I constructed the pattern as instructed with only a few exceptions. As I mentioned above, I omitted the pockets so was able to skip the pocket construction steps. The fun slit of the skirt was left out in this shorter top version, so I chose to finish my hem with a standard turned under ⅝” hem rather than a hem facing. Aside from these details, I treated the peplum as the skirt and followed through to the end as directed!

To add a little detail, I decided to skip the standard straight stitch on my hem and try out one of the decorative stitches on my machine. This special little detail is hardly visible, thanks to the black thread on black fabric, but I know it is there and it makes my heart happy! (The black on black also made it a super safe place to try a decorative stitch for the first time – had it gone absolutely wrong, it wouldn’t have been easy for anyone to notice!). In just the right lighting, you can catch the hem detail at the bottom.

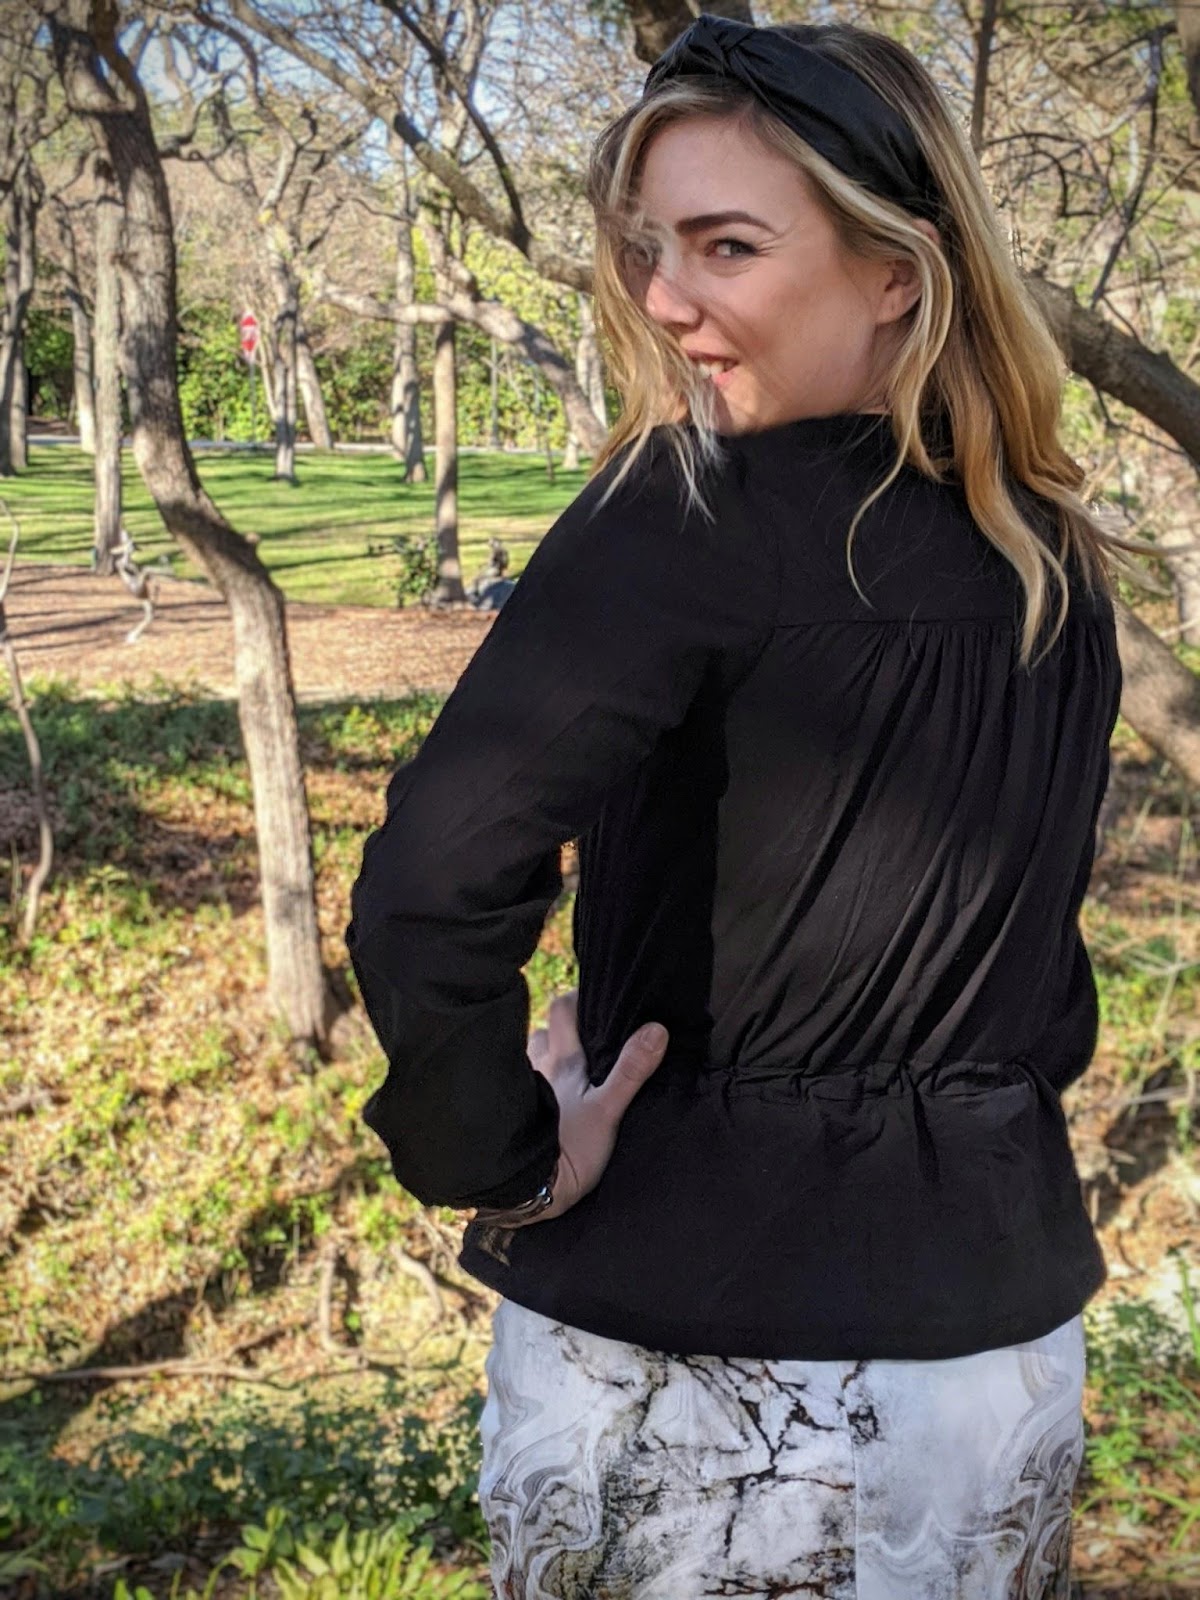
I felt very put together and fashionable when I was wearing this top. I wore it to work in the morning with a pencil skirt and my favorite headband, which was a new pairing for me. In the past, I’ve always felt like a pencil skirt called for either something very flowy or very fitted that would tuck into the waistband. I’d never considered pairing a peplum with a pencil skirt, and it was just a happy accident of being halfway between trying on one outfit and another that I realized I love this combination.

After work, I changed into jeans and my favorite hat. The top was still perfect! These are the Ash Jeans that I made for my 29th birthday – they are fantastic, but are a little stiffer denim than I am accustomed to and are just a tad bit smaller than I would like right now. For this reason, I like my shirt to not be figure skimming but to definitely cover my waist in these jeans… And this was the perfect option!

I’m very tempted to sew up a few more of these. I think this classic black is going to get a lot more mileage than I would’ve guessed in my wardrobe, but I’d love to repeat this same silhouette in some other fun colors and prints, as well. I’d even consider repeating this in the same fabric – there are over 30 colorways available, and I think the Cobalt Blue and Old Pink would be so lovely in this pattern!
I’ve had trouble before understanding the difference between a cotton lawn and a cotton voile, and this fabric helped me figure it out. It is still a cotton – it behaves well, is easy to press, and genuinely stays where you want it to when you’re sewing. It is thinner than quilting cotton, as is cotton lawn. Even in black, this one can be slightly sheer in the right lighting. However, it is softer and slightly less crisp than the cotton lawns I’ve worked with in the past. It drapes a little better, wrinkles ever so slightly less, and I have a feeling that the more I wash it, it might develop a slightly slubby texture. It is a fabulous fabric to work with, and I look forward to a few more cotton voile garments in my closet in the future.

Top: handmade by me
Fabric: Minerva – Cotton Voile Fabric – Black
Pattern: Chalk & Notch – Orchid Midi Dress (Hacked)

Key Ingredients:
Brother XR9500PRW Sewing Machine
Brother 1034D Overlocker
Schmetz Universal 70/30 Needles
Dahle 36×48 Self-healing Cutting Mat
Thanks for reading my thoughts on hacking on this pattern! The pattern used in this blog post were purchased by me. Though the fabric used in this post was generously provided to me by the awesome team at Minerva in exchange for a blog post (which will go up on Minerva sometime soon!), all words and opinions expressed throughout this post are my own, as always. Links provided throughout this post may be affiliate links – if you choose to purchase any products through these links, I may receive a small commission, at no cost to you. This simply helps me justify the costs of my sewing habit and the time it takes to share it with you!! Happy Sewing!
- XX Elizabeth


Only registered users can comment.